

How To Repair Crumbling Plaster Walls
Plaster. This single, solitary word in the old house colloquial elicits a visceral reaction of sorts in many people. It's a feature trait of buildings from 60 years to much much older that embodies the truthful nature of dearest/hate relationships among DIYers, renovators, preservationists, rehabilitators, flippers, home inspectors, and pretty much anyone who has every worked with the stuff. But interestingly enough, where whatsoever ane of those people falls in proximity to the seemingly moral thin red line of "rip it out" versus "repair, don't supplant," well, that's all based on the human relationship you've adult with the walls and ceilings of the by.
When nosotros moved into our house we had been indoctrinated by endless television shows and contractor horror stories in dealing with the fragile, crumbling, dusty, and gritty mess that tends to represent old fashioned plaster. And I'm non going to lie. When we started to think well-nigh our home renovation plans, the initial thoughts that our cracked, bumpy, and crumbling plaster was "too far gone" and the conventionalities that we'd need to "gut every room" entered into our conversations quite often. Just that was before we understood. Earlier we knew ameliorate. Before nosotros shook off the propaganda I'thousand rather certain started with the gypsum board industry, much the same way vinyl window salesman have long peddled the theory that a home's 100+ year quondam windows should certainly be removed in favor of energy efficient gems that cost a pantload and "should last a good 30 years." Oh, what a deal...correct?
Northward past Northside, Jeff SkrenesNorth past Northside, Jeff Skrenes
In reality, when you hear the phase "that house has adept bones," it's giving a sense of humanity to a edifice. The bones are represented by the framing and structural items, merely i needs more than than "skilful bones" to take a human who is worth anything. In an quondam home let'south be sure to expect past the "bones" and run into that the plumbing is the circulatory system, the electrical is the nervous system, windows are the eyes, HVAC is the respiratory system, and the plaster and lath walls roofing most interior surfaces, well, that plaster is your abode'due south skin. And we all know that the skin is the single most of import organ the body owns.
Every bit nosotros learned more than well-nigh our dwelling house's plaster in our early days of renovation, we learned what a truly meaning aspect of our home is represented past its original horse pilus plaster that still covers the majority of the walls and ceilings. Not only does it offer a basis for wall and ceiling covering, it also provides a unique texture to the interior of our home that drywall board doesn't provide. Slight imperfections, a gentle hand laid whorl to the surface, and the noise canceling characteristics of solid, one inch thick or wider plaster adds to the ambiance of any former home, and to lose that, well, y'all begin to lose the soul of the business firm.
The result of our pedagogy in plaster is a deep seeded desire to salve and repair plaster whenever possible. Information technology's less invasive, more than environmentally friendly, cheaper (from a DIY perspective), by and large cleaner (though cleanliness is all relative), and maintains the historic grapheme that is besides easily lost in homes today. We've covered how nosotros use plaster buttons to secure our sagging ceilings and cracked walls, as well as how we use a mix of drywall, joint chemical compound, and patience to patch holes left in the plaster by diverse projects, only we've never actually covered a major project dealing with repairing old plaster and mixing in new materials on a much larger calibration. Well, that is, until today when we kick off a multi office postal service on how to attain this very thing.
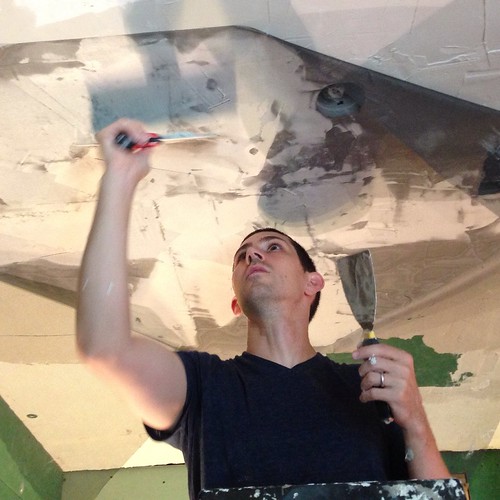
We've been working on the walls and ceiling in the bathroom, trying to bring the room back into respectable shape while working to preserve equally much of the original material of the room equally possible. But in our bath nosotros accept a mix of original plaster, plaster patches, and drywall patches on the ceiling, and drywall on the walls (someone removed all of the wall plaster long before we e'er set foot in our domicile). Our goal is to bring our bang-up, sagging, and ugly plaster ceiling back from the brink, while also making certain the drywall on the walls still has that graphic symbol building hand laid plaster look to it. And we desire to do it all in a DIY manner, without breaking the depository financial institution, and without wanting to kill ourselves due to the level of difficulty. Piece of cake enough?
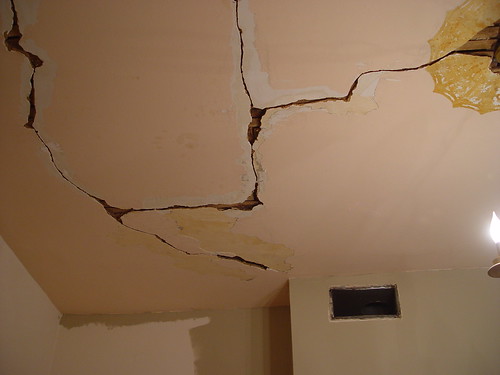
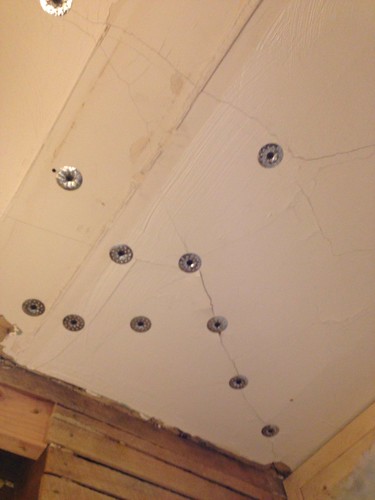
When we started this whole thing the plaster on the ceiling was textured and in bad shape. Near contractors or homeowners would look at this every bit a lost crusade and move right into ripping the whole matter down. But not usa, no way!
Instead, nosotros began our typical process to repair and revive. We systematically went effectually the room applying plaster buttons at one foot intervals along the ceiling joists. The idea behind this is simple. Gravity has likely had its way with the ceiling over 100+ years, and the heavy plaster has slowly either pulled away from the wood lath behind it, or it'due south begun pulling the lath nails right our of the joists. Placing the buttons forth the joists pulls the ceiling back upwards into a stable location. I like to use ii" or 2-one/2" drywall screws for screwing into the joists.
If you're doing something similar, and you lot notice a lot of sag in whatsoever particular surface area, beef up the number of buttons you lot're using. Place them every six inches or and so to make sure there's something sturdy to pull against.
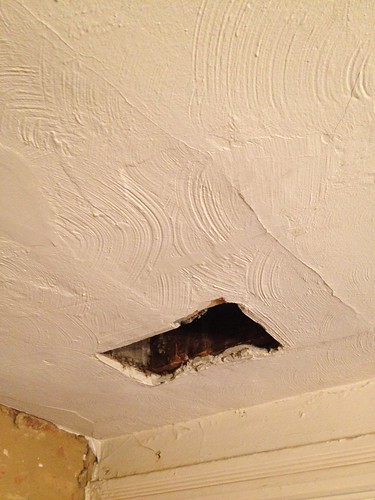
Once the joists are buttoned, then movement on to areas with significant slap-up or failing plaster. These areas only have the board behind information technology, but the plaster keys (the office of the plaster that pushed through the lath before drying) take often failed, leaving the ceiling or wall unstable. Though the plaster is no longer secured to the lath, yous tin still use the lath equally back up for the prepare. For these, I like to switch to ane-1/4" drywall screws, since there'southward just a need to screw into the lath.
There are ii major keys here:
- Make certain you're screwing the plaster push button into the middle of a slice of lath, otherwise the board volition likely crack and volition non offer whatever support. Information technology's sometimes necessary to guess wrong before you can guess right, then don't worry almost trying a few spots.
- Make certain you only tighten the spiral to the indicate where it fully grabs. If y'all over tighten the screw, it volition easily strip the hole in the board and you'll lose about all of your support.
Surround the crack, hole, or otherwise failing expanse with lots of screws and buttons to fully support the delicate plaster areas. You lot tin can also employ the lath equally backer for screwing in drywall patches cut to the size of the hole. Since plaster tends to be most a half inch thick in our house, it's almost perfect to just put in a half inch piece of drywall to fill the hole.
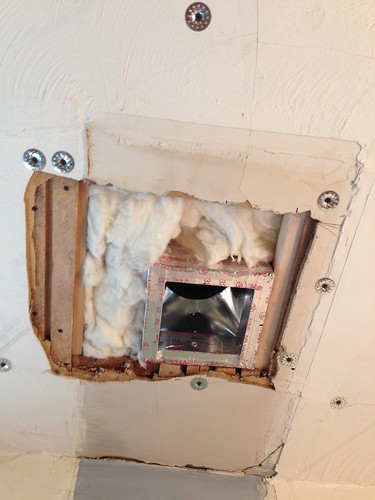
Once you've used about double the number of buttons you think you lot should have used, and your giant holes or missing plaster have been patched with your material of pick, you're in pretty expert shape and tin move onto the next footstep of applying your kickoff layer of skim coat.

It'southward of import to sympathise how plaster, no matter how many buttons yous use, will continue to movement as time goes on. Any cracks already in the plaster tin can exist patched, simply unless yous stabilize the top coat and isolate it from the problem area, you lot'll terminate up with cracks in the wall again every bit normal expansion and contraction occur. This is the reason this next step is so critical.
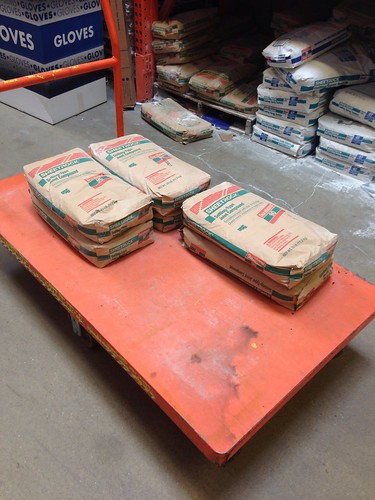
I prefer to use the brown bag setting blazon joint compound for my skim blanket. You can use the pre-mixed bucket, only information technology tends to set up softer and therefore can incur dings and divots more easily. Also, using the pre-mix in a bathroom isn't a practiced choice because the moisture of the room tin can activate the mix after it'southward already cured.
Purists and preservationists state that you should only use lime based plaster for any skim blanket over plaster, and that using joint compound is similar to committing an act of treason. In some respects, they are absolutely correct. Lime plaster should only every patch lime plaster. If you take plaster walls and are able to either strip all paint and/or wallpaper exposing the bare plaster, absolutely and 100%, only use hydraulic lime based plaster.
But for usa, our plaster is a mish-brew of layer after layer of paint, patched drywall areas, and who knows what else. Now that we've been at this for many years, and we've been using joint compound all forth, we run across no signs of failure, keen, or peeling that would make united states of america think we shouldn't continue right on doing what we're doing. However, each case is unique, so delight don't take our experience as a definitive "how to" on correcting each and every plaster problem. If we're e'er in another house with original plaster walls, there'southward a pretty good risk we'll be using lime plaster everywhere.
Okay, on with the show...
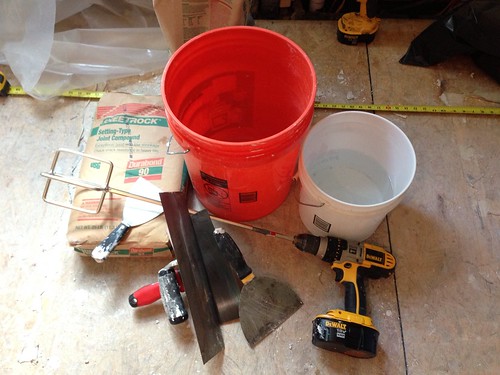
I like to mix up virtually one-half a bag of articulation compound at a time in a 5 gallon bucket. This is profoundly simplified past using our awesome hammer drill. I've institute information technology works best to add together some water to the bucket starting time, then add nigh one-half the corporeality of joint compound you actually want to mix up. This allows you to mix in more h2o than you demand and gives you a very watery mixture. This is expert, because it eliminates lumps and pockets of dry joint compound, and then yous go along to add together joint compound and h2o, a bit at a time, until yous've mixed up enough and feel like you have what you need.
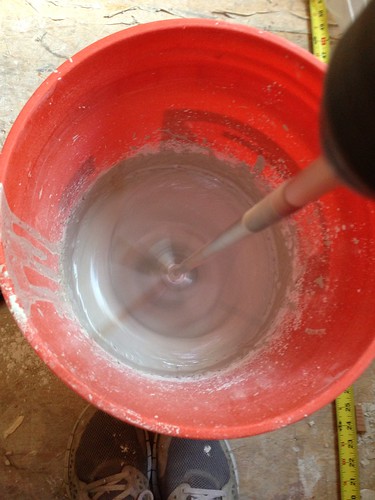
I tend to mix this get-go bit of compound a piddling on the looser side. I'd say it's probably most like a cake batter consistency (just don't eat information technology).
The goal of this first bit of joint chemical compound is to cover every surface in a very quick efficient mode. If you're using the 90 articulation compound (equally I like to usa) you only take nigh 70 minutes of working fourth dimension before your mix will start to thicken, and about 100 minutes before it heats up and turns solid.
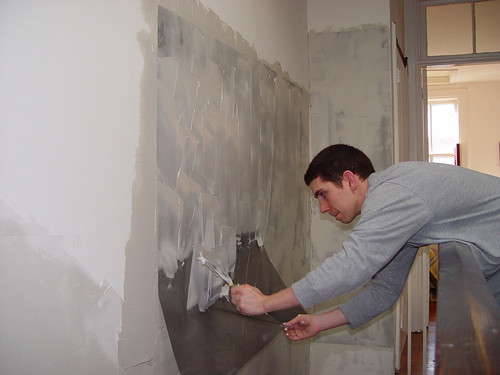
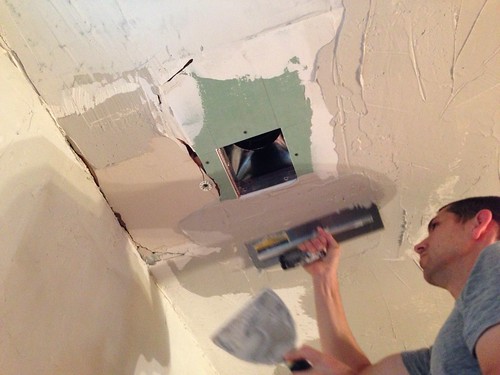
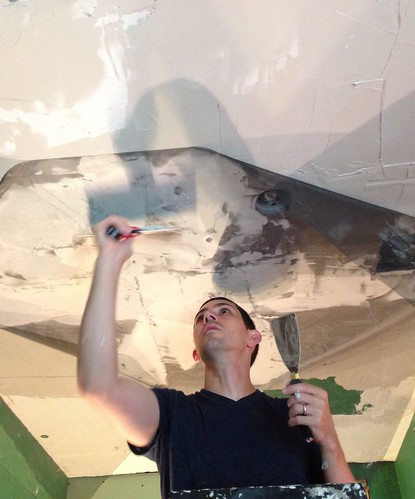
Using a flat trowel in my right mitt and taping knife in my left, I quickly utilise the joint chemical compound over the whole ceiling or wall, loading the trowel with the taping knife before spreading information technology on in one quick movement. Since this is just the base glaze to achieve coverage, you don't need to worry about getting it particularly smooth. You're going for even, thin coats.
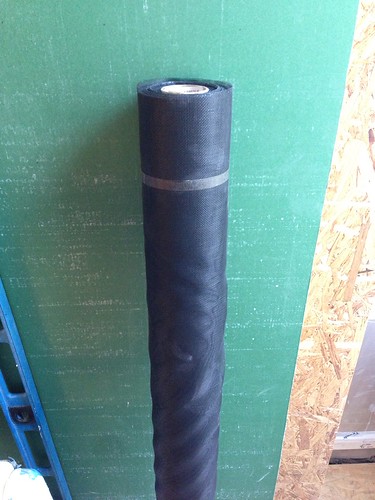
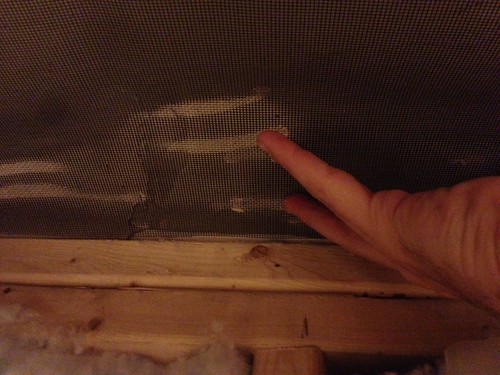
Once you've covered the expanse of wall where you need to work, the side by side step achieves what can be considered the plaster's new isolation layer. Using a scroll of fiberglass mesh (nosotros use standard fiberglass window screen in 48" 10 100' rolls), cut a slice of fiberglass that you'll be able to work with. I discover a 4'x4' sheet is well-nigh as big equally we can reasonably handle at one time.
Then, using the taping knife, brainstorm embedding the screen in the however wet glaze you but practical.
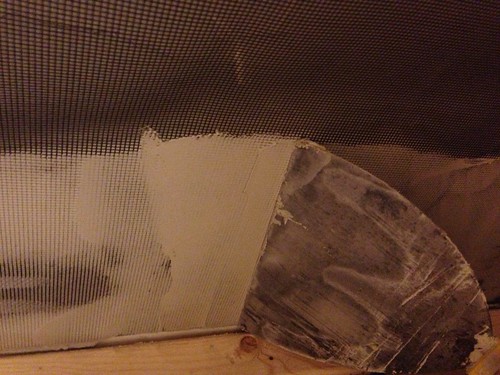
In that location is definitely a play tricks to this step, as yous need to brand sure y'all apply the screen evenly in the correct position and without any measurable wrinkles or folds. Any bumps, air gaps, or irregularities may weaken the cease consequence, merely volition definitely cause an inconvenience and pain in getting a good finished surface. If I'one thousand having a hard time I outset to embed just a little bit of the screen using my fingers. Y'all tin can easily meet if information technology's working when the screen is absorbed into the articulation chemical compound.
To accomplish the smooth application I like to use the "Union Jack" approach. I start at ane edge of the screen and use the taping knife across the entire screen to the opposite side, placing an embedded line right in the middle of the piece of screen.

With the eye of the screen on the wall or ceiling, I begin working with the taping pocketknife from the centre towards the edge, starting with a cross that is perpendicular to that outset line.
Over again, starting from the middle, I brainstorm making diagonal lines out to the corners, finer making markings similar to the Union Jack flag.
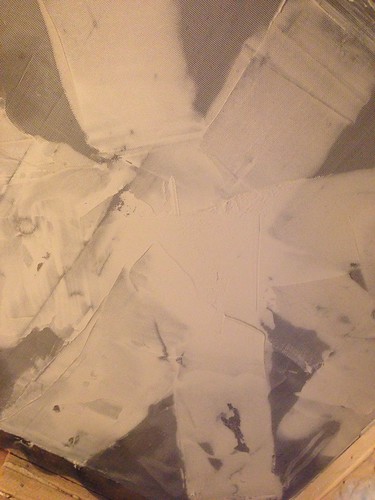
This tends to reduce the likelihood of any bubbles or folds every bit I'm only working from the centre out. Once the Union Jack is in place, I just piece of work to methodically, always from the heart to the edges, to embed the remainder of the of the screen in the still wet joint compound.
To ensure full adhesion, I then get over the whole affair with the flat trowel or large taping knife, eliminating whatever pockets and smoothing any significant bumps.
At this point I like to keep working on putting up screen in the room until all of the screen is in place. Repeating the process for each piece, I ensure an overlap of at to the lowest degree iii or four inches on each piece. You could movement onto the side by side footstep and start jumping around a bit, only I find that to be as well overwhelming.

If information technology's a big room, you may run out of time on the joint compound before it begins to cure. If that happens, it'southward important to time your procedure so you lot aren't left trying to embed the screen in dry joint compound. Otherwise you'll end upward frustrated and with a bunch of built upwards joint compound that you lot now take to somehow scrape or sand off.
As you lot movement around the room, in that location volition be holes that need to be cut in the screen (such equally for lights or ducts). Don't carp trying to pre-cut those holes. Go ahead and put the screen up on the ceiling and allow it to get over summit of the holes. One time you've embedded it in place, come back with the utility knife and cut it abroad. The screen cuts really hands once in the articulation chemical compound, and even easier after the joint compound has had a chance to harden up.
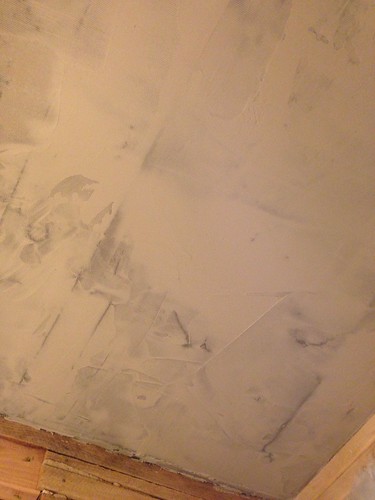
Once y'all've covered the entire room in screen your offset layer is done. Sit dorsum, relax, clean up your tools, and admire your difficult work. It doesn't expect like much, simply you're well on your fashion to a wonderfully smooth and no longer croaky/falling down wall or ceiling. For us, in our bathroom, we'd lived with the horrible texture on the ceiling, the bad cracks, and the fear that the whole thing could come crashing downwards at whatever moment for so long that the expect of the screen over the whole ceiling was a marked improvement and gave us a tremendous sense of hope.
In our next post we'll go along covering the process and will fill you lot in on the next steps in correcting ceiling and wall plaster issues. Nosotros'll besides touch on on the first steps to taking a newly hung drywall wall back in time with our tips for making drywall look similar it belongs in a house full of plaster walls and ceilings, all equally a DIYer.
What are your thoughts on plaster? Are you in a "do whatever it takes to save it" oversupply, or practice you tend to the "rip it our and replace it" side of the fence?
We have a whole series of plaster repair/skim coating posts you should cheque out if you like this or are trying to tackle the same affair. Here's the whole list for convenience:
- Plaster Repair for DIYers - No Need to Rip Information technology Out - this post
- Plaster Buttons to Fix Your Crumbling Ceiling
- Plaster Repair Office two: Laying a New Brown Coat
- How To Fix Plaster Like a Dominate: Sand Baby Sand
- DIY Plaster Repair: We Finally Put the Skim in Skim Coat
- My Skim Coating Nickname is Mr. Smoothen - The Tricks I Apply to Earn It
- The Final Steps to Perfect Skim Coating
Source: https://www.oldtownhome.com/2013/10/18/Plaster-Repair-for-DIYers---No-Need-to-Rip-It-Out/
0 Response to "How To Repair Crumbling Plaster Walls"
Post a Comment